You ’d think that by this sentence in the year , I ’ve already exhausted the most common methods of plant propagation . I ’ve already written guide about circularise by ejaculate starting , direct cuttingsand plantdivision .
Alas , I have more multiplication methods up my arm . They may not be as commonly used , but they are just as efficient . And one method that I do n’t see mentioned very often is propagation by layering .
Layering generation may not be very coarse ; but I count that if you ’ve been growing strawberry ( or even just hold up strawberry picking ) , you ’ve see it in action without earn it . The strawberry mark plant grows runners that debase from the main flora and put down root word next to it . When those runners are mature enough to endure on their own , we sever them from the female parent plant , get the picture out the roots and move them to a different localisation .

The part we’re propagating will continue to be attached to the mother plant.
When we ’re spread by layering , we ’re basically doing the same thing . We ’re taking cuttings without actually stimulate the cut . We ’re copy what nature does for some of the plants in our garden when it send above - terra firma blue runner that rootle when a node makes contact with the filth underneath .
What are the advantages of layer propagation?
countenance ’s lecture about the pros first . Why choose layering over other propagation methods ?
1. There’s a low risk of the new plant drying up.
Since the radical we ’re layering stiff tie to the parent plant until it gets its own root , the risk of our propagation expire from want of moisture is greatly repress .
You know how I always recount you to keep cuttings anddivisions well wateredso that they do n’t choke before they get a chance to root ? That ’s not such a trouble in layer extension . Of course , you still have to irrigate the main plant in case of drought , but you ’d have to do that anyway .
2. Layering is a good method for plants that are hard to propagate in a different way.
When I showed youhow to take rhododendron cutting , I was honest about the low luck ofallthe press cutting turning into new plants . Some plants are just very slippery to circularise . Not impossible , but you will necessitate a lot of backup and a fate of patience .
This is often the case with shrub and other woody perennial such as camellia , magnolias , cornus , forsythia and yes , rhododendron . fortunately , there ’s always more than one method to propagate a plant . So if cuttings are failing to take off , give layering a endeavour .
3. We end up with a larger, more mature plant.
When we take cuttings , we ’re start a blade new plant from a lowly while of prow , often ten inch ( 25 centimetre ) or shorter . Even if the extension is successful , it will take years for that plant life to grow larger .
When we layer , we often choose branches that are larger than a even cutting . So when the clip comes to swerve the propagation off the main plant , we end up with a large raw industrial plant . It may not be much , but when it fare to easy - grow plants ( such as camellias and rhododendron ) , tight - forwarding a couple of years makes a big difference .
What are the disadvantages of propagating by layering?
I always need to exhibit you with the full picture so that you’re able to make up one’s mind for yourself whether this method of propagation is right-hand for yourself and your garden . So here are some of the drawbacks of draw more plants by layering .
1. Successful layering can take up to a year.
Since we ended the list of vantage by mention how layering can salvage you time , you may have pay off the wrong impression that it is a quick process . It is easy , but it ’s not dissolute . It can take up to a year between the fourth dimension you do the layering and the time the newfangled industrial plant is ready to stand on its own .
In my experience , it take about eight month before I was ready to cut the cord for a new climbing hydrangea works . I kept checking root formation after the 4th - calendar month mark , but the superimposed branch just was n’t root enough to suffer on its own . So having forbearance is key when you ’re layer plants .
2. It requires enough space around the main plant.
This may or may not be a disadvantage look on how your garden is set up . In a large garden with plenitude of space in between bush , you ’d have no problem layer ramification left and right-hand . In a besotted space , this becomes an subject .
Any stem that you ’re layer must stay in place throughout the whole duration of the propagation , so you ca n’t just move it around to make way for more flora . You have to clear enough space around the parent industrial plant and keep it clear for up to a twelvemonth .
This is not a problem when you disseminate potted works though .

3. You may need a different temporary setup.
In some cases , it ’s out of the question for the branch that ’s most appropriate for layer to get through the soil . This is often the case for vines that have already mature jolly mellow above background . Take , for lesson , my adept jasmine . The very mature radical goes on for about three metrical foot ( one meter ) before you start getting to any subdivision . Even the longest vines ca n’t reach the ground enough to remain in place for layer .
So the solution is to land the ground up to the branch . I go down up a stool next to the industrial plant and put a container full of pot grease on the stool . Then I lowered the offset into the potting grime . Again , this may not be a disadvantage if you have enough blank to accommodate this setup in the long term .
4. You may damage your plant in the process.
In Holy Order for the superimposed branch to stay in space , you have to bend it as far as possible to be parallel to the earth . Some branch ( usually young growth ) are more pliant than others ( elder emergence ) . The job is that you wo n’t know until you prove bending it .
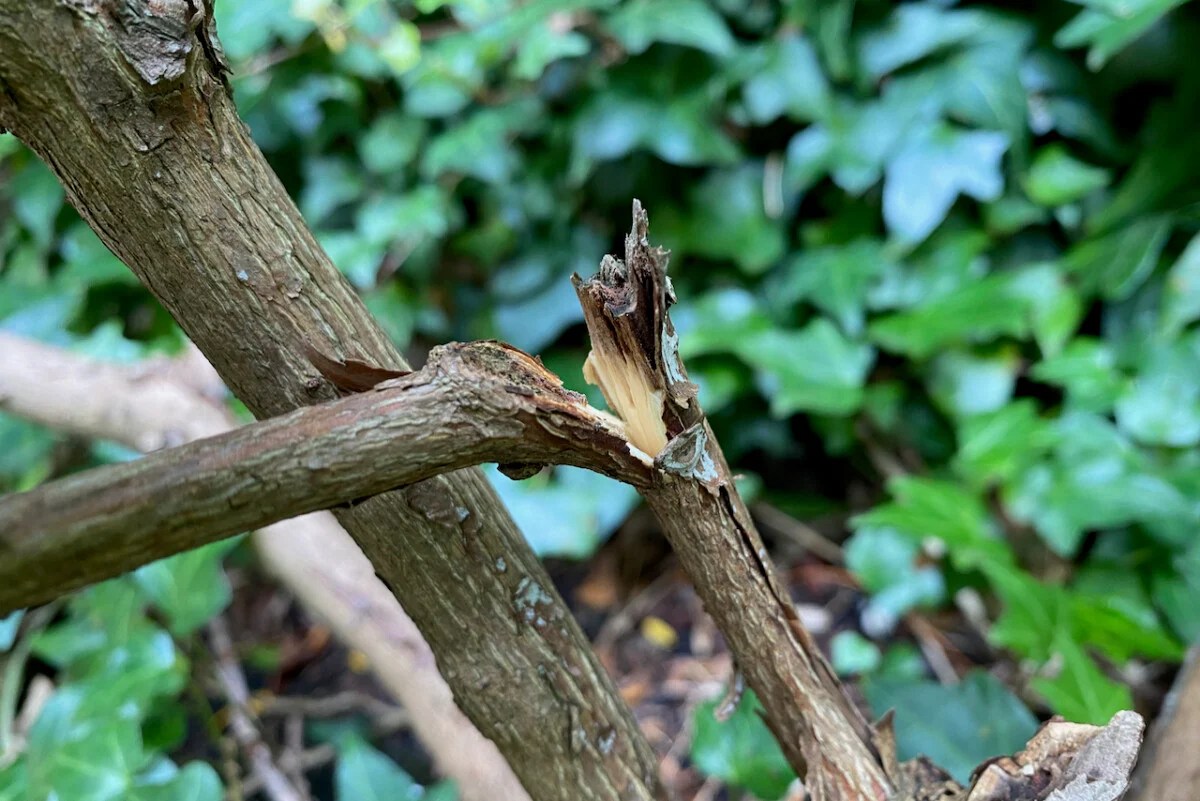
I managed to snap a rhododendron branch in the process of trying to layer it . Lesson memorize and moving on .
What plants can you propagate by layering?
Here ’s a leaning of the most common garden plants that will respond well to stratum multiplication .
Rhododendron
camelia
The part we’re propagating will continue to be attached to the mother plant.
roll of tobacco George Walker Bush ( Cotinus )
Summersweet ( Clethra )
Magnolia

Before you try any other propagation method for rhododendrons, try layering them.
Cotoneaster
Daphne
Jasmine
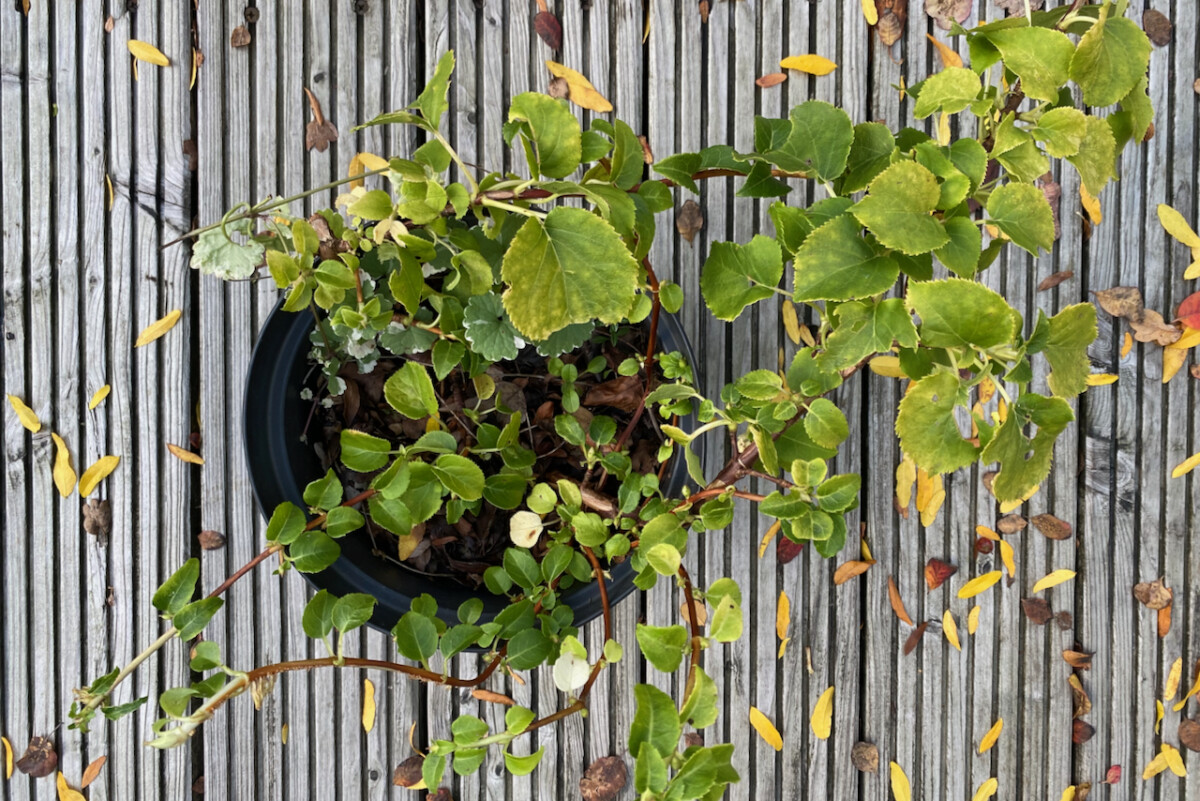
My new climbing hydrangea is much larger than it would have been from cuttings.
Potato vine ( Solanum jasminoides )
Heather
Forsythia

Baby currant propagated by layering the branch on the right of the photo.
Honeysuckle ( Lonicera )
Clematis
Hops ( Humulus )

Ok, the example of this guava might be a bit extreme. But you still need space around the parent plant to do layering propagation.
Nipponese Stan Laurel ( Aucuba japonica )
Mountain Arthur Stanley Jefferson Laurel ( Kalmia )
Holly ( Ilex )
The vines of this star jasmine can’t reach the ground. So I’ll have to bring some soil up to them.
Climbing hydrangea ( Hydrangea anomala subsp . petiolaris )
Bougainvillea
Juneberries ( Amelanchier )
Unfortunately, even the low-growing branches on this rhododendron were not flexible enough to be bent.
It ’s worth observe that there are also some plants that layer themselves , without any outside intervention from us gardeners .
In addition to hemangioma simplex , plants such aslavender cotton(Santolina chamaecyparrus),rosemary , savory(Satureja),creeping Jenny(Lysimachia nummularia),southernwood(Artemesia abrotanum ) andperennial candytuft(Iberis sempervirens ) grow outward arm that acquire root upon touching the territory . you may only split up them from their mother industrial plant , then dig up the roots of the fresh plantlet and relocate it .
How to propagate by layering
For all the other plant on the list that do n’t layer themselves , here ’s a simple , four - step method that you could fall out .
Step 1: Select a suitable stem for layering.
We ’re specifically depend for a low - growing or low - hang offset that is flexile and does n’t have efflorescence buds or bloom of youth . For some plant life , this is tricky to find because commonly the low branches are older hardwood that tends to snap easy . So be very aristocratical when you ’re try your branches .
There ’s more flexibleness if you ’re distribute a potted plant because you’re able to raise or lower the mother plant without putting too much emphasis on the bended stem .
Step 2: Prepare the stem for layering.
Just like when we propagate via cuttings , we start by rifle the leaf off the stem to expose the leaf nodes . This is where new increase will emerge from .
I also had to trim off some of the adjoining flowering branches that were in the direction . The goal is to have a clear length of stem with at least one folio knob below ( but two nodes would be ideal ) .
In rescript to speed up the rooting process , we ’ll also seduce the stem before we layer it on the primer coat . Make a pocket-sized incision on the bottom of the stem – where it will allude soil – at or near to a leaf joint . But do n’t cut the leaf joint off . Keep the scoring more surface - degree so as not to cut through the entire stem .
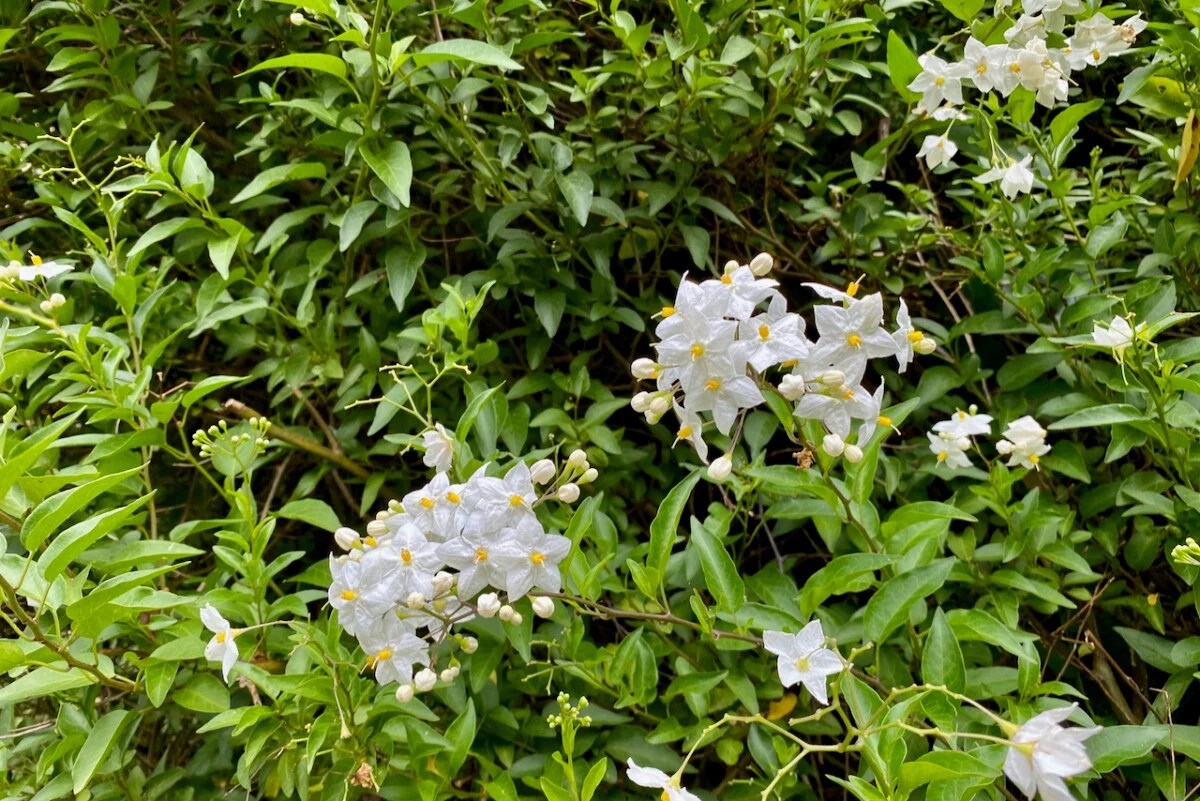
Potato vine has nothing to do with potatoes. But it will make a beautiful privacy hedge.
I ’ve find out some tutorial where the gardeners stick in a small pebble or a toothpick to keep the wounding open . I pick out to pass over this extra measure because it adds to the risk of snapping the branch in half and have to lead off all over again . That may just be me being extra clumsy and extra conservative though .
Step 3: Prepare the ground for layering.
One of the advantages of layer propagation is that there are different frame-up . you could layer from a planted shrub to the ground next to it , from a imbed bush to a container next to it , or from one potted plant to another .
If you ’re layering direct in the ground next to the parent plant life , excavate a shallow trench for the root word . Do n’t dig too deeply , unless you ’re confident you’re able to bend the arm even further down .
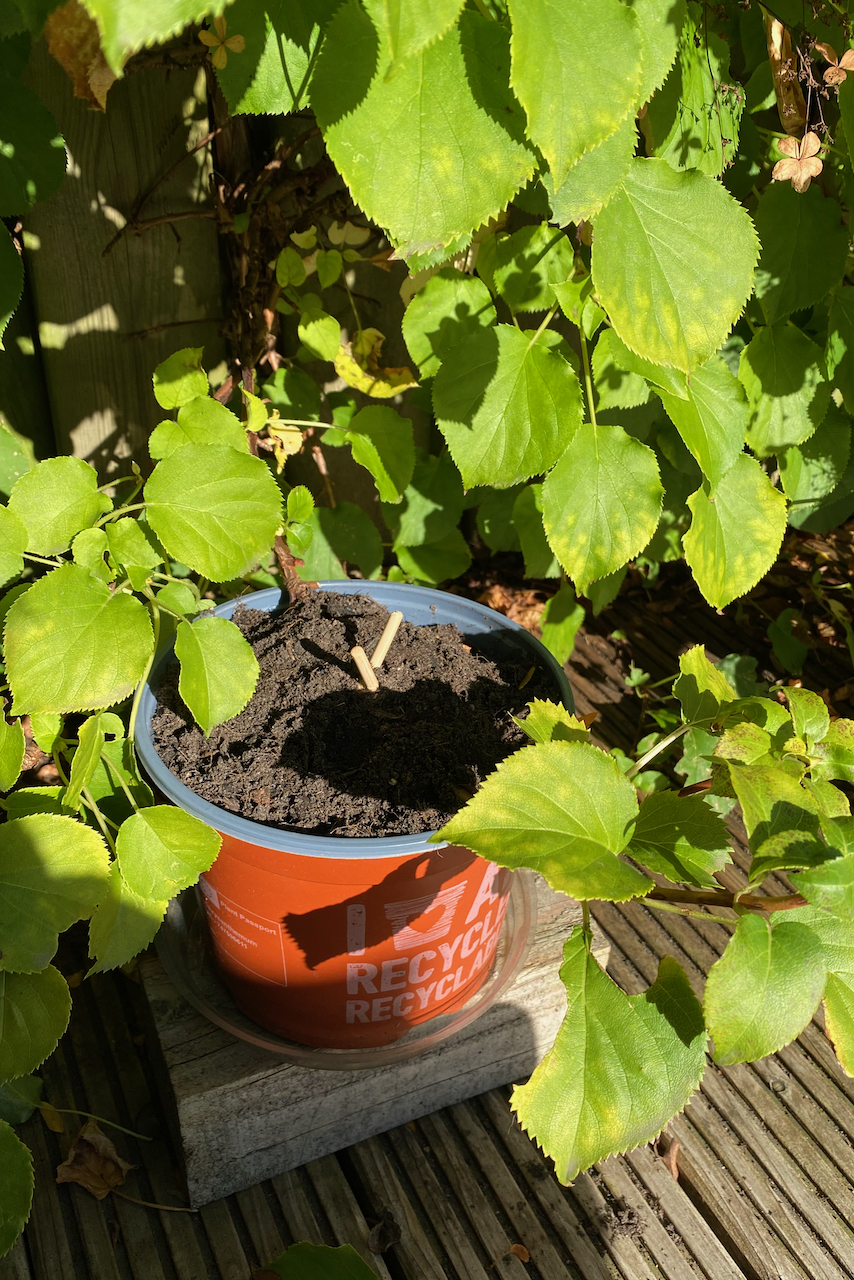
I ’m propagating the mounting hydrangea which is maturate on the fence along my pack of cards , so there is no land underneath it to layer in . That ’s why I ’m using a container for layer propagation . And since the depleted branch does n’t quite pass on the pot , I ’m being extra resourceful and prop up the container up on a block of Mrs. Henry Wood .
Some plants, such as this Creeping Jenny, will do their own layering where their leaf nodes touch the ground.
If you ’re doing container layering , make certain you ’re using complimentary - debilitate soil and a potful with drain hole .
Step 4: Layer the branch and secure it.
lightly bend the branch over the soil or the deep you dug with the scored division and the foliage leaf node touching the soil . press out the stem in the stain . It will not last out there when you rent go , so you ’ll need something to batten down it in place .
Depending on how potent and outflow - loaded your branch is , you may utilise a U - dead set wire or a couple of bamboo sticks . I ’m using a yoke of chopstick that cover at the top to form an X. And just to make certain they last out in lieu , I pressed them unwaveringly in the ground and I tied the top with a piece of string .
If you ’re using a large branch for layering , you might even have to put down a bit of weight to prevent it from go . I think that evenly propagate weight – such as a diminished bag of compost – work much best than using a rock candy or another potted plant .
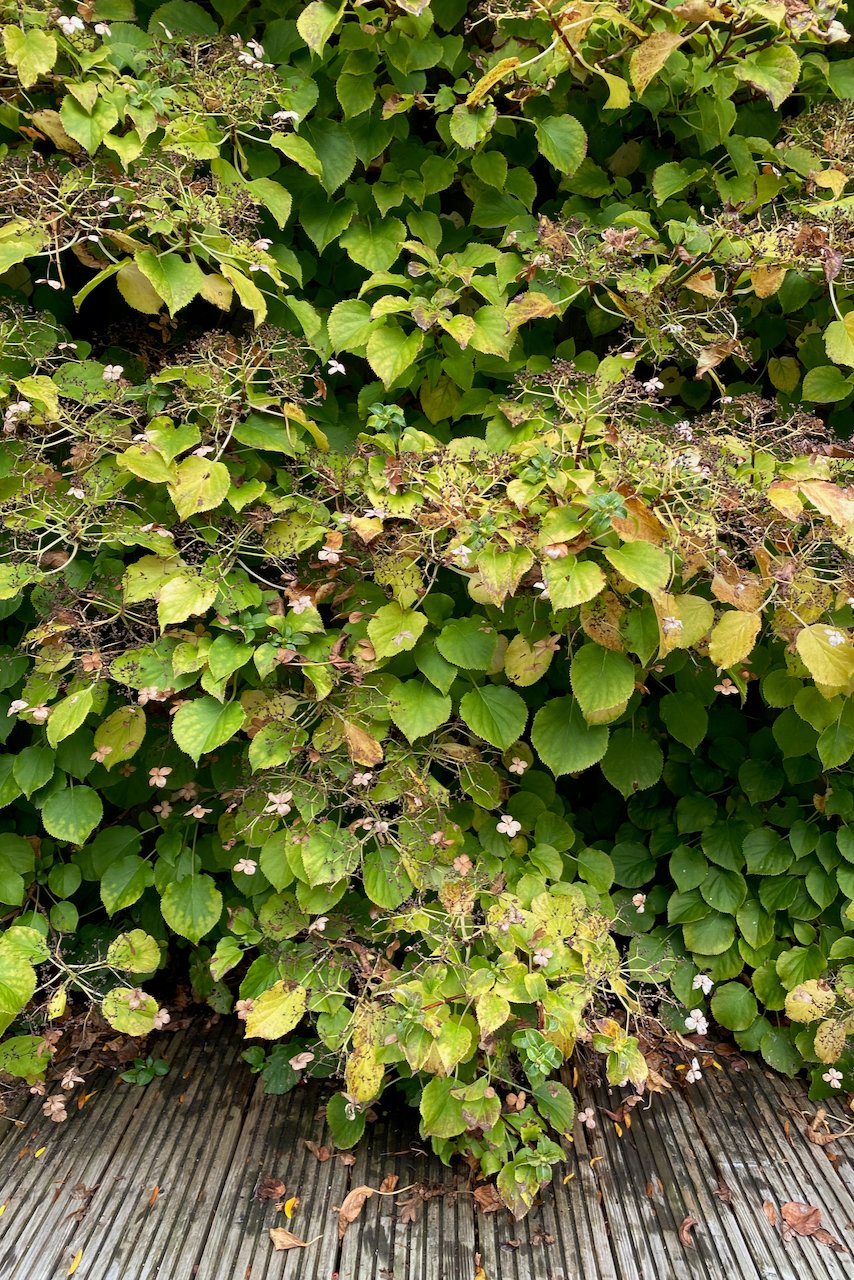
I will be layering the low-growing branches of this climbing hydrangea.
Once the stem is strong , cover it with more soil and tauten it in . If you ’re layer straight on the ground , now it ’s sentence to fill the trench back up . If you ’re layer in a container , mound some potting soil on top of the layered stem . Water it soundly , then add more soil on top .
Over the coming months , keep both the parent plant and the layered offshoot sufficiently watered . This is especially important if you ’re propagating a potted plant . If you ’re circulate a container industrial plant in the summer , move both containers to a partially shaded area to avoid heating and drought emphasis .
How long does layered propagation take?
It can take between six months and a year for the superimposed branch to grow root that are strong enough to sustain a new plant . I ’ve noticed that fall propagation takes longer than spring propagation . And that make everlasting sense because plants enrol dormancy and stop growing during the cold time of year . But one of the reward of circularise by layering is that you could get it determine up in any time of year .
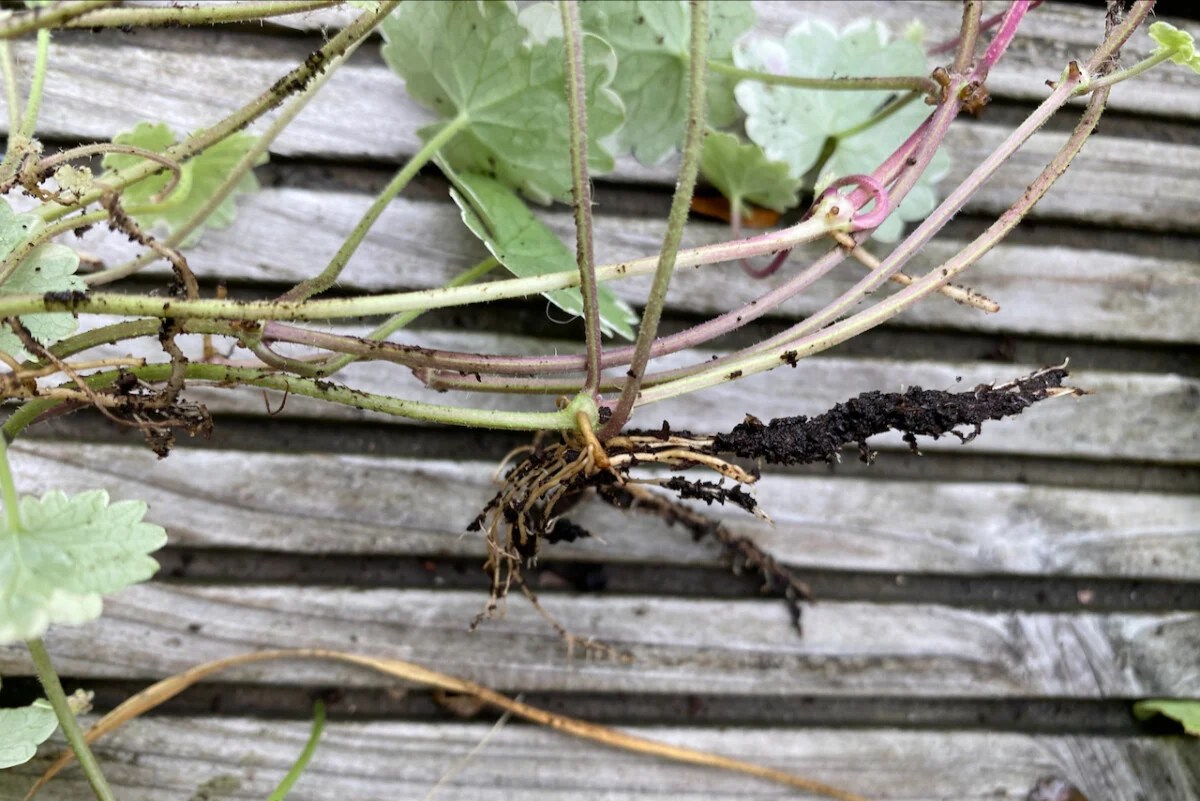
Sometimes , you ’ll see new growth emerging from the tip of the superimposed branch . But I usually do n’t bother insure for root geological formation for at least three or four months .
When you do , gently labor the branch to see if there ’s any resistance . If there is , that stand for new ascendant have grown from the foliage node . Even at this point , I keep the new flora in place for at least a couple more months .

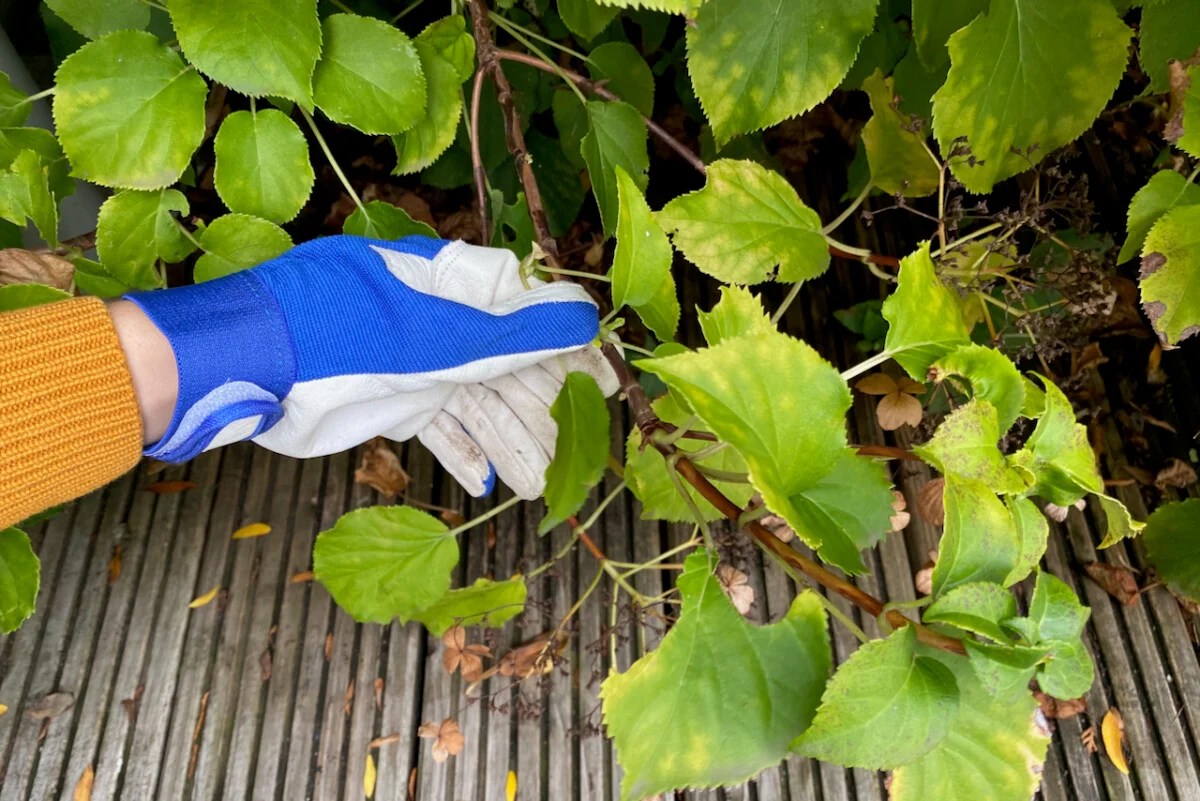
The goal is to end up with a nice length of stem. It should have at least one node.
When the time come , I cut the superimposed branch off the parent works and replant the young plant life as I would a novel division .
Even though it does n’t liken to the almost instant gratification of seed starting or repeated plant division , distribute by layering has a high rate of success . I promote you to give it a try and see for yourself how easy this method acting is . And how self-satisfied you get to feel when you ’ve bring home the bacon .
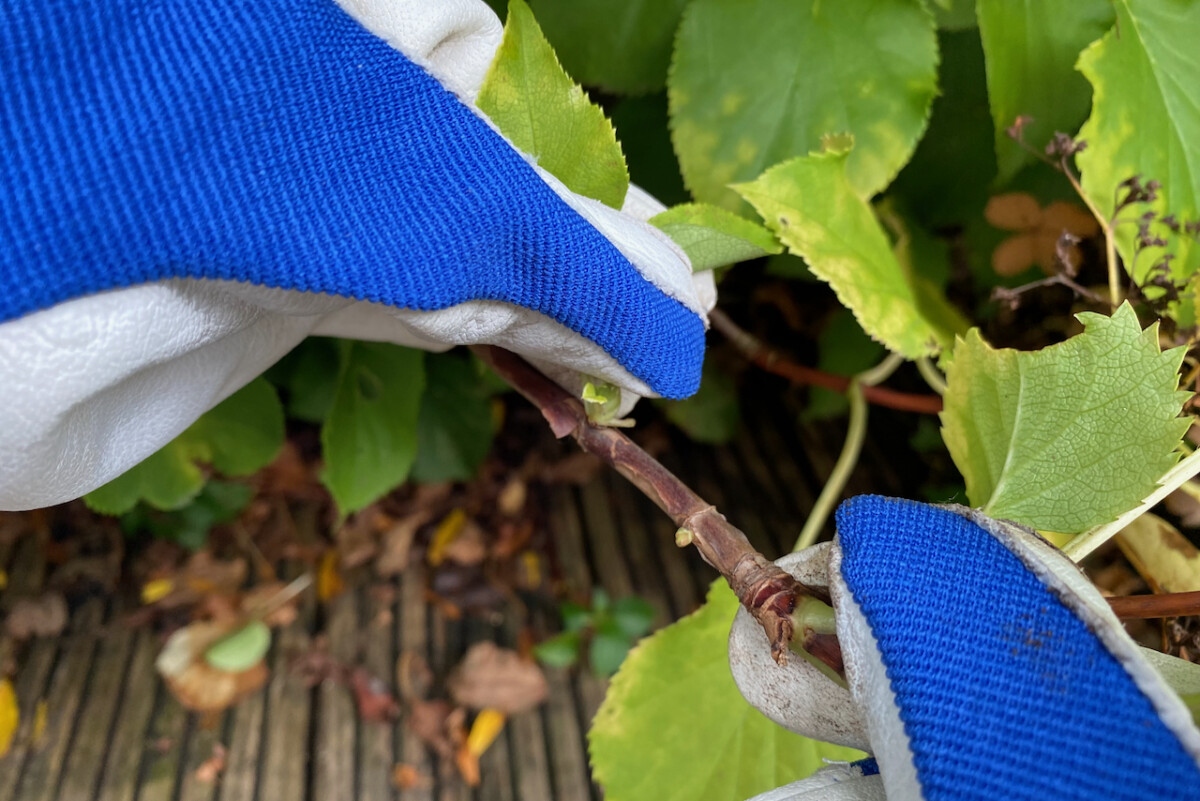
Strip off the leaves to expose the nodes. The nodes will go underground, so you don’t need leaves.
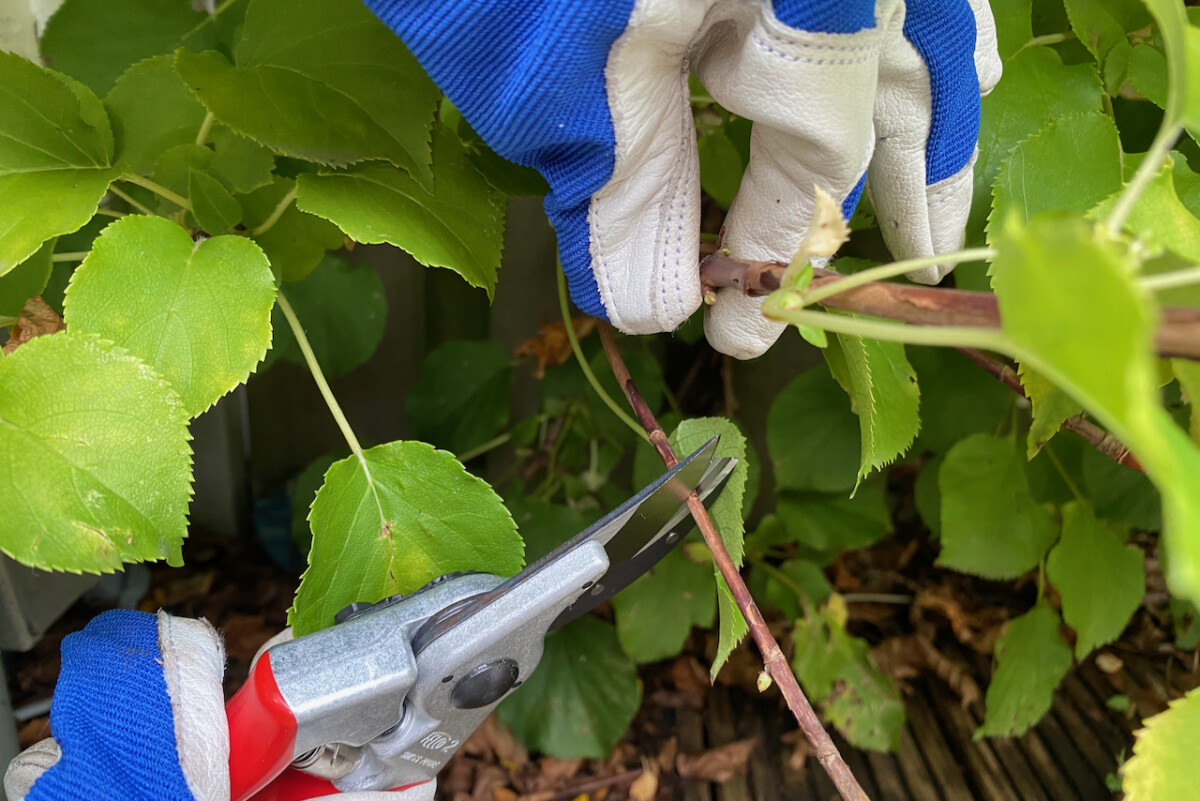
You can cut off any other branches that are in the way.
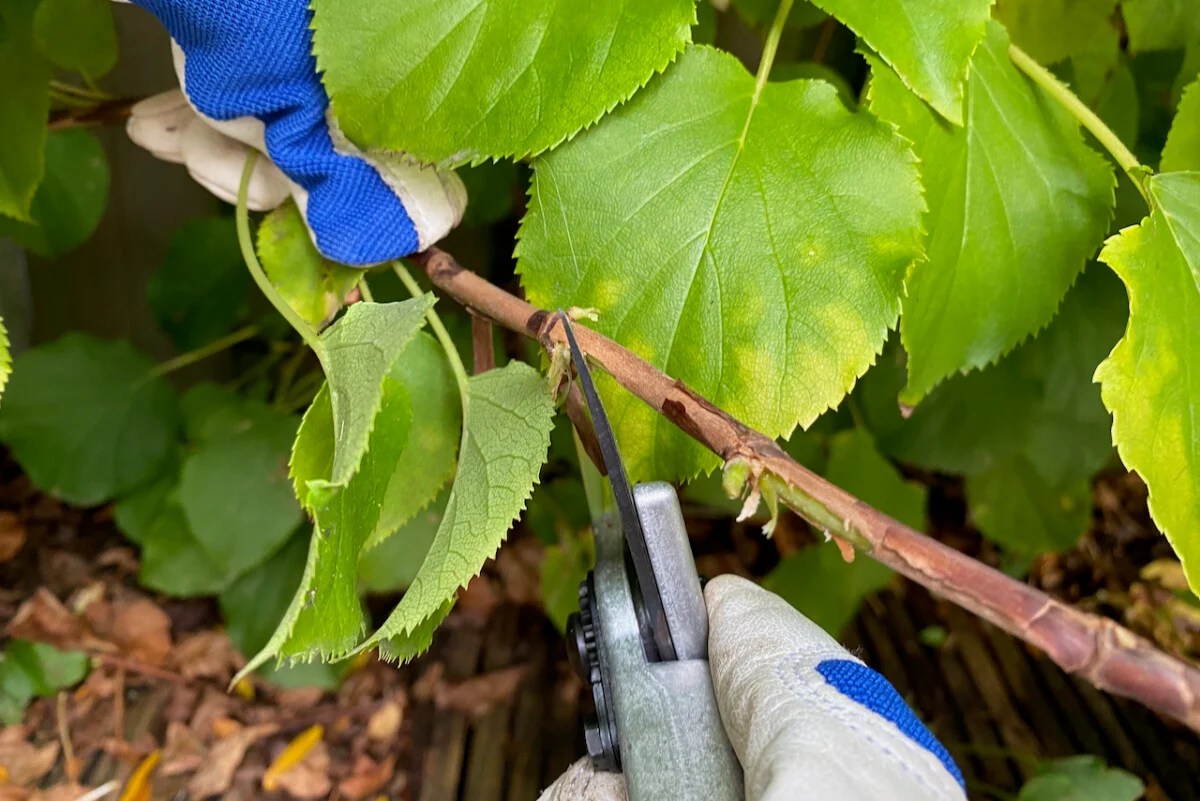
Score the stem. But be careful not to cut through it.
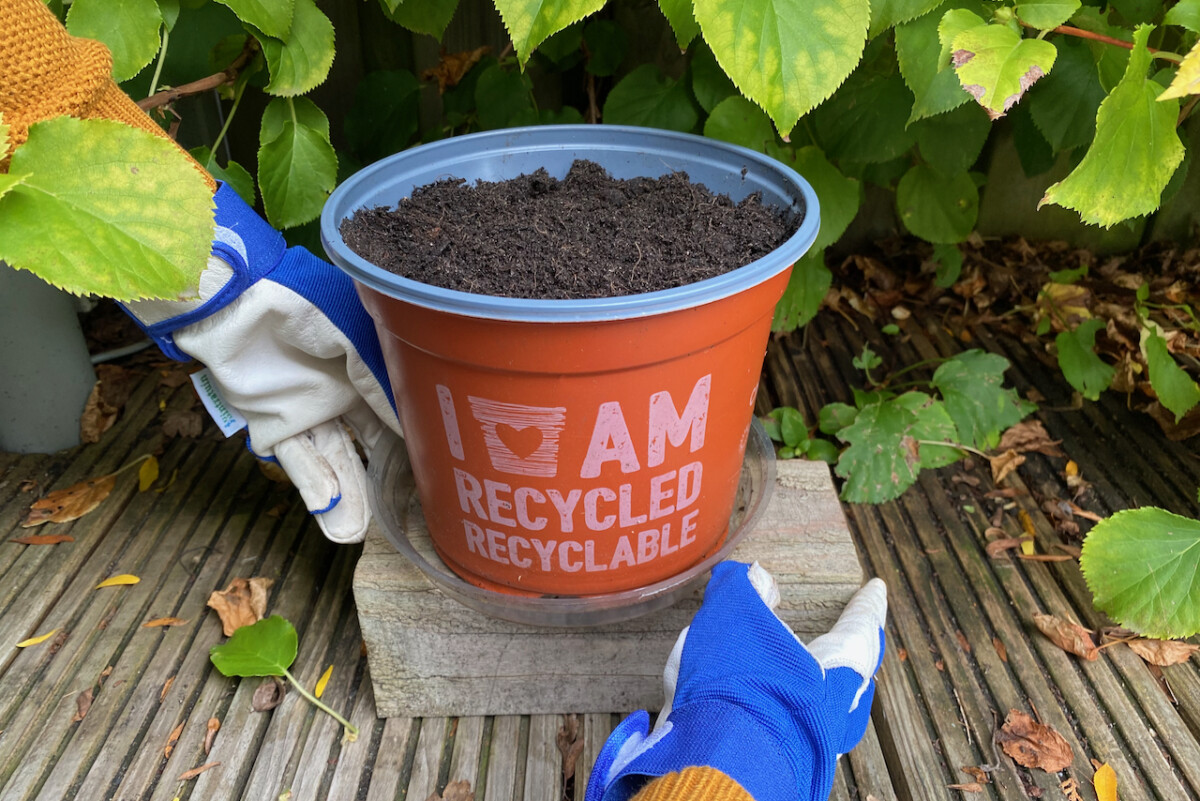
Raising the soil to meet the plant. This propagation setup worked before, so I’m confident it will work again.

Press the stem into the soil, with the nodes touching the ground.

I’m using a pair of chopsticks inserted all the way down into the pot.
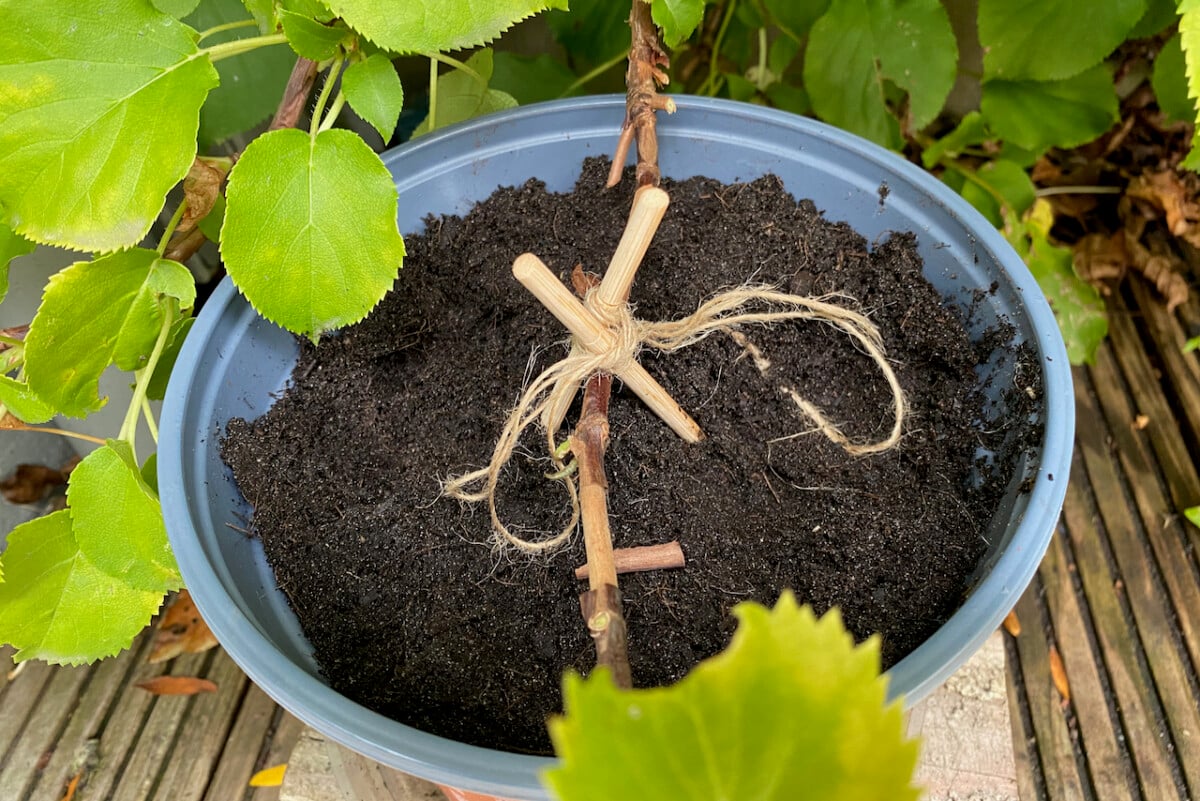
I tied the chopsticks at the top to secure them in place.

Then top it up with soil to cover the branch.

The nodes need to be covered at all times. Don’t let this dry up.
A week later and it’s still staying in place. Now we wait.
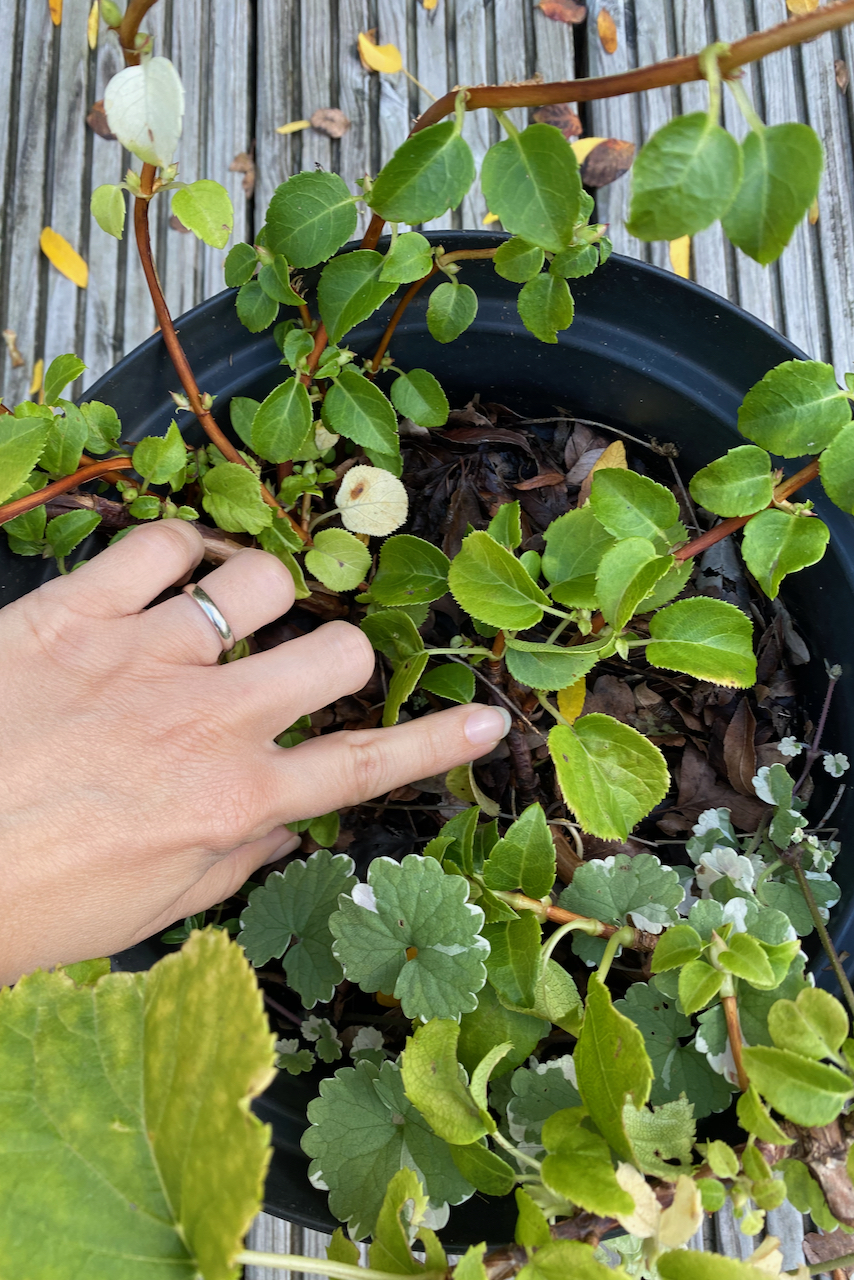
This is a climbing hydrangea plant that I propagated via layering last year. The nodes are now roots and the new plant is self-sustaining.
