flower
Orchids are beloved around the domain for their unique growth patterns and sensational flowers . Whether you ’re growing a Cattleya or a Cymbidium , this guide will shroud a few of the most common propagation methods to produce your solicitation .
Contents

Few other flora earn as much lovemaking and attention as orchidaceous plant . Aunique group with becharm flowers , they ’ve spawn perceptiveness smart set and consecrated buff that focus solely on growing these interesting flora .
produce orchidaceous plant can seem somewhat of a mystery to gardeners , especially regarding the indium and outs of propagating . regrettably , it ’s not as simple as trim a root and popping in a glass of water , as is the case with some other plant . Their social structure necessitates more involvedpropagation method , depending on which orchid type you ’re mature .
We will focus on three of the most common pick for home gardeners here . There are many more expert methods to research if you ’re concerned , but for those without a horticultural lab at home , these methods cover the staple of propagate orchidaceous plant .

Orchid Propagation Methods
There are many orchid propagation method to choose from depending on the type of orchid you have ( and how much patience you have to complete the cognitive operation ) .
Regarding propagating , it ’s authoritative to live whether your orchid is monopodial or sympodial . Monopodial orchids(Phalaenopsis and Vanda ) have asingle ascendent systemthat ca n’t be divided ( hence the prefix ‘ infectious mononucleosis ’ in the name).Sympodialorchids(Cattleya and Cymbidium ) developpseudobulbsalong low - growing rhizome that can be part to produce independently .
If you ’re spring up a monopodial orchid , your best propagation option is fromkeikis – the first method we ’ll search at . For sympodial orchidaceous plant , you could try out the other two methods , depending on the sizing and growth of your plant .

Method 1: Propagating From Keikis
As moth orchids are one of the most commonly grown – especially in my home – let ’s start with their propagation method first .
Monopodial orchids ca n’t be part like sympodial orchids . Instead , they raise bantam plantlet known as keikis that can be off and replanted . The term ‘ keiki ’ is Hawaiian forbaby , an apposite description of the small growth that finally germinate into mature plants .
When you propagate orchidaceous plant from keikis , they may take a couple of days to flower , depending on size of it and environs . But this is a far quicker result than some other propagation methods , peculiarly growing from ejaculate . bloom are the highlight of every orchid , and seeing them flower earlier is a immense highlight of this method acting .

To start propagating from keikis , you necessitate a sharp tongue and a plant ready for circulate . snap up a raw container and potting intermixture ready for planting once the keiki is transfer .
Identify Keikis
Before you grab a knife and get ready to chop away , you ask to make certain the orchid you ’re growing has a keiki . Moreover , that keiki will call for to be with child enough to grow on its own before you consider remove it .
On monopodial orchids , keikis usually appear at nodes along the flower spikes . Rather than the bloom you would expect , you ’ll notice a small and direct gullible bump . This bump finally sprouts leaves and origin , creating an interesting visual once it grows orotund enough . If you have multiple keikis on one plant life and forget them to grow , the smoke can become top - heavy and topple over .
Orchids can also produce keikis at the cornerstone of the flora , known descriptively as ‘ basal keikis ’ . Most orchid growers prefer to leave these on the plant , only cut back off keikis along the spike for the high luck of success .

Keikis will draw wet and nutrients from the parent works to grow leaves and ascendent . You ’ll need to wait until those roots are about two inches long before trimming to check the keiki can hold out severally . haze over these aerial roots occasionally to stop them from drying out .
If your orchid has no keikis , there are room to boost them to pop up with a marvellous product known as keiki paste , although it can be crafty and quite technical . This involves slicing into the stemwith a sharp tongue , just above a node . This will expose the bud . Then , you’re able to apply keiki paste . If you ’re successful , you ’ll see a keiki emerge after a couplet of month .
Remove The Keikis
When you ’re keiki has retentive enough roots to be removed from the stem turn , grab a crisp tongue or pair of shears . Make trusted you houseclean and sharpen them before you start , or you risk spreading disease not only to the parent orchidaceous plant but to the keiki too . A clean cut heals the quick and void any harmful damage .
Cut into the ear an inch or two away from the substructure of the keiki . Avoid cut off any subsist leave or root , as these need to be as healthy as potential to avail the keiki establish .
Prepare A Container
To plant your keiki , you ’ll need a small container withplenty of drainage golf hole . low containers are choose over larger ones to stop the industrial plant from becoming unbalanced .
When preparing the container , fill up the bottom with a desirable orchid potting commixture . These specialised mixes , normally available from local stores or online , are barque - free-base and contain the ripe proportion of ingredient that orchids love . The mixture postulate to enfeeble incredibly well and match the epiphytic ontogeny habits of these plants .
Plant The Keiki
Lower the keiki into the newfangled container and fill in any gaps with more orchid potting mix . Adjust the plant until the leafage are lifted off the stain , and the plant is posture unsloped . Once it is stable , piss immediately to moisten the radical . go forward to irrigate regularly when the roots dry out to encourage them to spread out into their unexampled container .
Keep the raft in a hopeful area shielded from intense direct sun in your greenhouse , indoors , or on your patio or balcony . If you keep up with care , you ’ll get to watch the midget baby farm into a full and flowering orchid within a few year .
Method 2: Propagating By Division
Sympodial orchids are much easier to circularize by division , as you would with many other tropical plant life .
You will ask a mature orchid to take up with , with enoughpseudobulbsto split into two or more divisions . Pseudobulbs appear on the low - growing rootstock of sympodial orchid , storing water to keep the plant alive during times of drouth . They appear interchangeable to other flower electric-light bulb you may have experience with but do n’t function in quite the same way .
Division call for separating the rhizome into sections containing a few light bulb . Combining this operation with repotting is salutary once your orchidaceous plant has outgrow its pot , allowing you to complete two time - ware tasks in one .

Along with your fledged orchidaceous plant , you ’ll need a disinfect knife to veer into the rhizome , new container for each of your naval division , and powdered fungicide ( although this is optional ) .
Unpot The Orchid
protrude by take out the orchidaceous plant from its current container . Depending on how large and overgrown the antecedent system is , this may take some travail . If it is lodge and refuses to stir , wedge the sides of the container ( if it is plastic ) orrun a knife around the edgesto dismission roots from the side of the pot .
When the plant is unaffixed , turn the container on its side and softly pull the works out from the foundation . orchidaceous plant can be problematical but do n’t apprise being pull rough from all directions .
seize the base of the works and gently shake it out until all the roots are loose . you could also shake off some of the bark to closely analyse the rootstock for the next stone’s throw .

Look For Pseudobulbs
Next comes the detective piece of work – seek for pseudobulbs . start from the center of the works , take a tight look at the rhizome and work outwards to blot the medulla oblongata emergence emerging from all side . Count as you go along , as the number of pseudobulbs will influence how many divisions you may make .
Healthy pseudobulb will commonly be green , with no signs of damage . Each surgical incision you split should have around four of these pseudobulbs to acquire successfully . For small-scale orchidaceous plant , it ’s often unspoiled to keep section big with a few more bulbs , but large plants can be split as many times as the rhizome allows .
Split The Rhizome
Once you ’ve identified each division , grab your knife to curve into the rootstock . A recently sharpen knife will make this business much gentle . piece of work outwards from the center and reduce the rootstalk into single sections disjoined from each other . Keep as many origin with each sectionalization as you may while limiting wrong to any parts of the plant .
After burn the sections , it ’s best to dust the slash surface with antimycotic agent . This step is n’t dead necessary , but it does protect your new plant from rotting and disease . If you only have a few part of this individual plant , an extra step that will keep them healthy and live is well worth the effort .
Repot Divisions
As you would with keikis , repotting is the terminal pace in the process . Use small containers and awell - draining orchid mixto give each variance the best possible start . After planting , irrigate them and set them in a bright area to encourage the roots to steady down in and push newfangled emergence to issue .
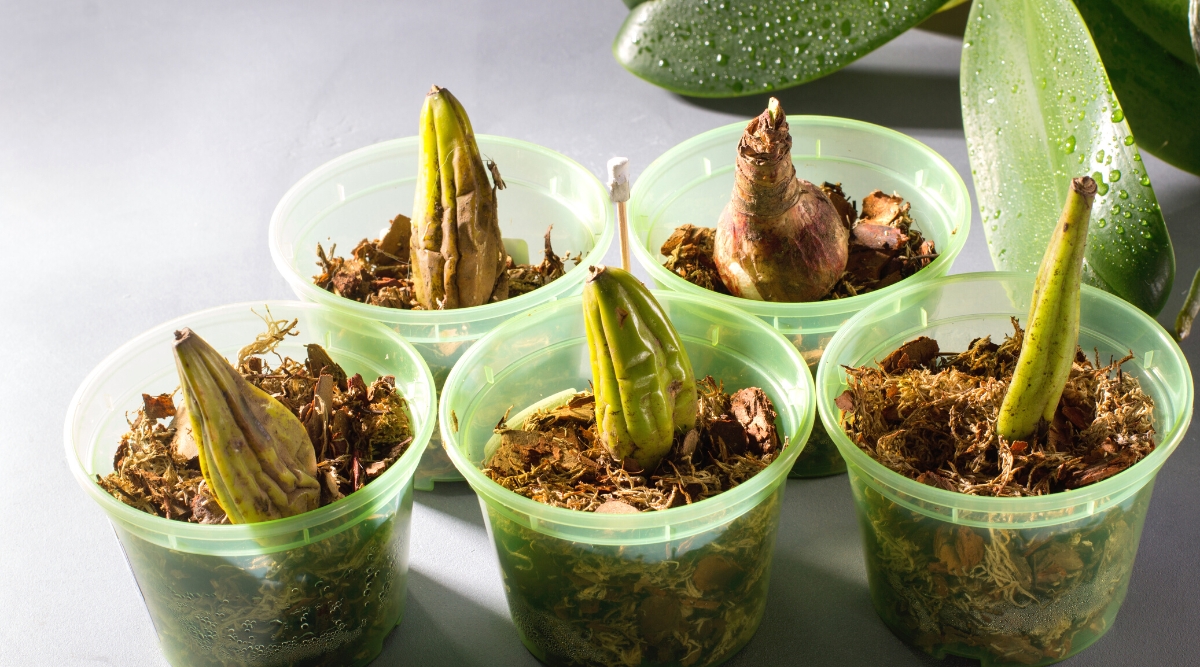
Method 3: Propagating From Back Bulbs
Propagating from back bulbs is not usually prefer due to the broken success rate as compare to the other methods . However , if you ’re dividing and notice a few back bulb , there is no hurt in removing them to try this method . Although you may not be successful , there is also a chance you will get a blade - new orchid with minimum effort .
But first , what are back bulb ? Back bulbs appear on the out close of sympodial orchids that are no longer actively growing . Instead , they are storage facility for the orchidaceous plant , remaining dormant while attached to the plant . If removed , they can be promote to produce unexampled growth under the good conditions .
Much like division , it ’s best to do this while repot when you have easy memory access to the rootstock without a bunch of orchid barque in the direction . The same tools from the old propagation method acting will go here , adding some sphagnum moss to replace orchid bark if you prefer .

Remove Back Bulbs
start up by identifying sections of back bulbs that you could polish off from the main industrial plant . in the main , the larger the lightbulb , the greater your chance of success . It ’s also helpful if a leaf is still bond to the light bulb , but these normally drop off , so do n’t worry if your back bulb are mere .
Using a sharp tongue , skip these bulbs offthe principal plant or pull them off by manus , look on what mintage you ’re dealing with . avert damage the electric light to give it the best chance of rise root and germinate .
Plant
To push the back electric-light bulb to develop new growth , it must be institute in a moist pot medium . Most growers use bog moss moss , but you may keep them in orchid bark if you already have some fain .
constitute the back bulbs in this intermixture and lightly moisten them . Keep the pot in a warm and bright area and keep the growing medium systematically damp to boost Modern growth . Patience is primal here , as it can take several months to see any sign of results or activity around the eye of the bulb .
Repot
After several calendar month of meticulous care , you may be favourable enough tosee your back bulbs sprout . Once the roots have developed and the newfangled plant is establish , you may move the integral structure to a large container occupy with Modern high - timber orchid potting mix . Once replanted , tot up this new orchid to your assemblage to follow it grow and ( hopefully ) flush .
Final Thoughts
Orchid propagation may not be as easy as it is with some other tropical plants , but considering the beauty of these unique groups , I think it is well deserving the extra feat . sample propagate your own orchids at home to create an orchid assemblage you’re able to be proud of .